
Building your own raised garden beds is a rewarding project. It allows you to grow your favorite plants while adding beauty to your yard.
In this DIY raised garden beds tutorial, you’ll learn how to create functional and attractive garden spaces. Raised beds help plants grow better by improving drainage and soil quality.
Why Build A Raised Garden Bed?
Building a raised garden bed is a great way to grow plants. It helps you create a space that is easier to manage. Raised beds improve soil quality, drainage, and maintenance.
Better Soil Control For Healthier Plants
Raised beds allow you to customize soil for specific plant needs. You can choose the right mix of nutrients for your plants.Here are some advantages of better soil control:
- Adjust soil pH to match plant requirements.
- Add organic matter easily for nutrients.
- Control pests and diseases more effectively.
Traditional gardens often suffer from compressed soil. This makes it hard for roots to grow. In contrast, raised beds have loose, rich soil.
Improved Drainage And Less Soil Compaction
Raised beds provide improved drainage. Water drains efficiently, reducing root rot and making gardening easier. This feature is especially important in areas with heavy rain.
Less soil compaction is another advantage. Soil in traditional gardens often gets compacted from walking on it. This affects root growth.
- Reduces standing water.
- Enhances root health.
- Prevents diseases related to excess moisture.
In summary, raised beds keep your plants healthy. They create a favorable environment for growth.
Easier Maintenance And Fewer Weeds
Gardening in raised beds is easier. Maintenance becomes less time-consuming. You won’t need to bend as much while gardening. This feature is great for older gardeners or those with back issues.
Weed control is simpler. You can lay down mulch or landscaping fabric. This helps block weed growth. Here are some points on maintenance:
- Less bending reduces strain on your back.
- Mulch keeps weeds down.
- Routine care is quicker and easier.
In raised beds, you spend more time enjoying your plants. Less time dealing with weeds means more time for fun. Raised garden beds truly simplify the gardening experience.
Choosing The Right Materials
The materials affect the garden’s look and function. They also impact how long the beds last. Picking the right materials is important for the health of your plants.
Wood, Metal, Or Stone—what Works Best?
Wood, metal, and stone are popular choices for raised garden beds. Each has pros and cons in cost, appearance, and durability. Here’s a quick overview:
| Material | Cost | Appearance | Durability |
|---|---|---|---|
| Wood | Low to Medium | Natural look | 5-10 years |
| Metal | Medium to High | Modern look | 10-20 years |
| Stone | High | Classic look | 20+ years |
Wood is a common choice for raised beds. It blends well with nature. It is usually cheaper. But it may rot over time. Metal offers a sleek, modern look. It lasts longer but may cost more.
- Wood: Affordable and easy to work with.
- Metal: Durable and stylish.
- Stone: Long-lasting and elegant.
Consider your budget and garden style. Each material has unique benefits. Choose what suits your needs best.
Safe Woods To Use In Vegetable Gardens
Using safe wood is essential for growing vegetables. Chemicals in treated wood can harm plants.
Use untreated cedar or redwood to avoid chemicals in edible gardens. These woods resist rot and insects naturally.
- Cedar: Naturally resistant to decay.
- Redwood: Durable and has a pleasant scent.
- Pine: Affordable but may need to be replaced sooner.
Here are some woods to avoid:
- Pressure-treated lumber
- Painted or stained wood
- Wood with unknown chemical treatments
These options keep your garden safe and healthy. With the right wood, your garden beds will thrive. Choose wisely for the best results.
Planning Your Garden Bed Layout
Planning your garden bed layout is an important step in creating a successful DIY raised garden. A well-thought-out layout helps maximize space and ensures your plants thrive.
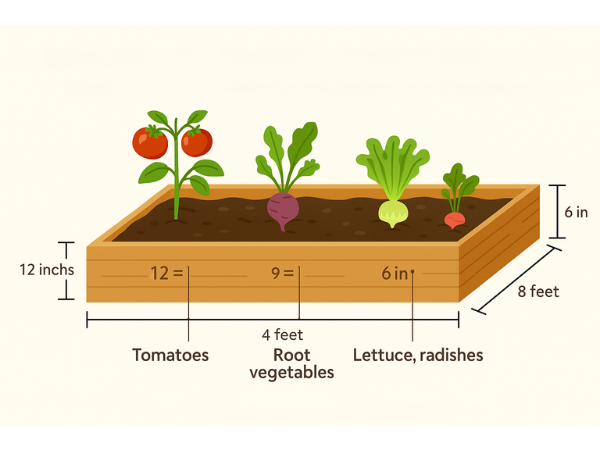
Ideal Bed Size And Depth For Different Plants
The common size for a raised garden bed is 4×8 feet, which provides ample space for various plants. The depth should be between 6–12 inches, depending on the type of crops you want to grow.
Here’s a quick guide to help you determine the ideal depth for different plants:
| Plant Type | Ideal Depth (inches) |
|---|---|
| Leafy Greens | 6-8 |
| Root Vegetables | 10-12 |
| Herbs | 6-8 |
| Tomatoes | 12 |
Choosing the right size and depth for your raised garden bed is crucial.
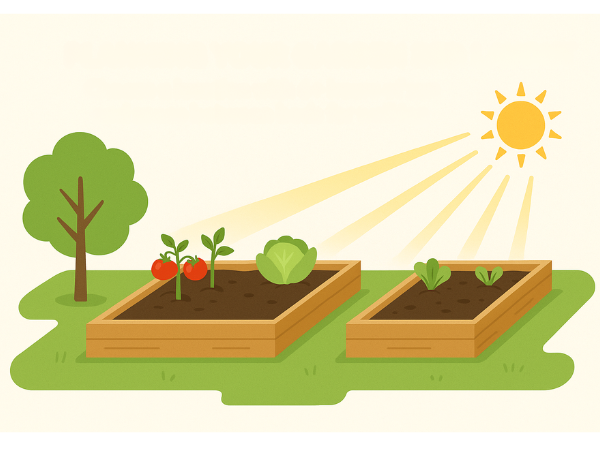
Sunlight, Spacing, And Accessibility
Choose a location that receives 6+ hours of sun each day. This will help your plants flourish. Plan your layout to avoid shading from trees or buildings.
Spacing between your garden beds is also essential. It allows easy access for maintenance and harvesting. Here’s how to plan:
- Leave at least 2 feet of space between beds for walking.
- Consider the height of the plants; taller plants can shade shorter ones.
- Keep pathways clear for easy movement and access.
Make sure you can reach the center of each bed without stepping on the soil. This keeps your soil healthy and reduces compaction. Proper planning makes gardening easier and more enjoyable.
Step-by-step: Building Your Raised Garden Bed
In this guide, we will walk you through each step of the process. You will learn how to gather the right tools, cut and assemble the frame, and prepare the bed site.
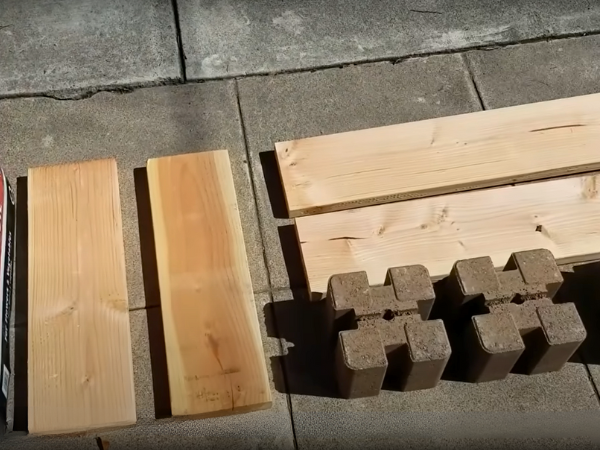
Tools And Supplies You’ll Need
Before starting your raised garden bed project, gather all necessary tools and supplies.
These tools are essential:
| Tool | Purpose |
|---|---|
| Drill | To create holes and secure screws. |
| Screws | To hold the frame together. |
| Measuring tape | To measure the wood accurately. |
| Level | To ensure the frame is even. |
| Garden soil | To fill the raised bed. |
With these tools in hand, you are ready to start building your raised garden bed. Remember the saying: Measure twice – cut once—then secure the frame corners tightly. This will help ensure a sturdy bed.
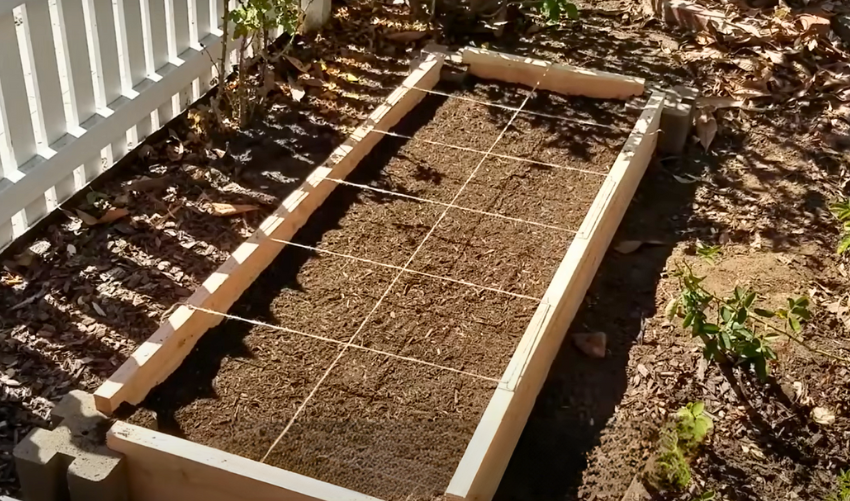
Cutting And Assembling The Frame
Start by measuring and cutting the wood for your frame. Common sizes for raised beds are 4 feet by 8 feet or 4 feet by 4 feet. Use the measuring tape to mark the wood accurately. Cut the pieces using a saw.
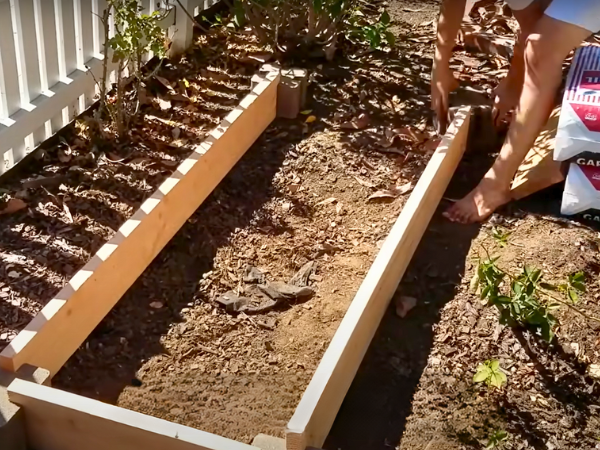
Once you have your pieces cut, it’s time to assemble them:
- Lay out the pieces in a rectangular shape.
- Use the drill to create holes for the screws.
- Secure the corners tightly with screws.
- Check the level of the frame.
Ensure that each corner is secure. This is important for stability. An even frame will help with the overall appearance and function of the bed.
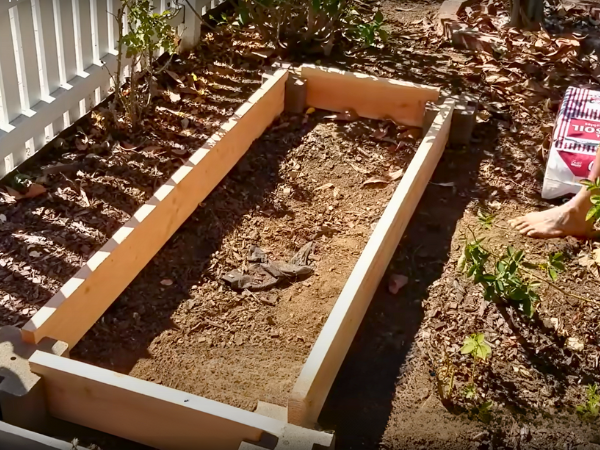
Placing And Preparing The Bed Site
Choosing the right location for your raised garden bed is crucial. Look for a sunny spot that receives at least 6 hours of sunlight each day. Avoid areas with too much shade or water pooling.
After selecting the location, it’s time to prepare the site:
- Clear away grass and debris.
- Level the ground to ensure stability.
- Consider adding weed fabric beneath the frame.
This will help prevent weeds from growing into your garden bed. Place the frame in the prepared site and check the level again. Adjust as needed to make sure it sits flat on the ground.
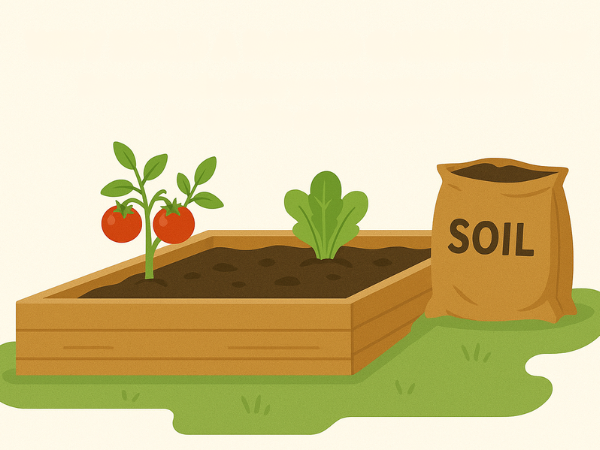
Your raised garden bed is now ready for soil. Fill it with quality garden soil, and soon you will be ready to plant your favorite flowers or vegetables.
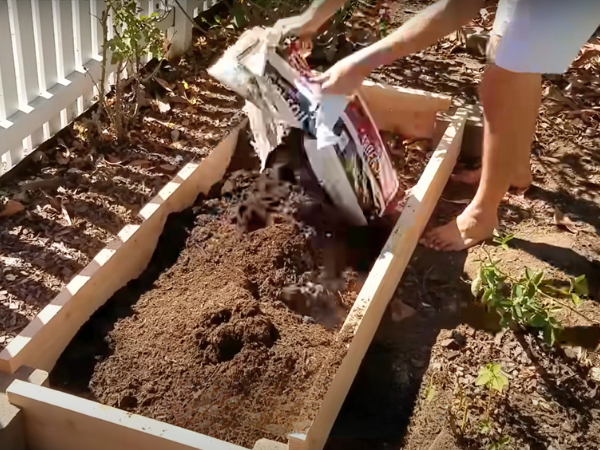
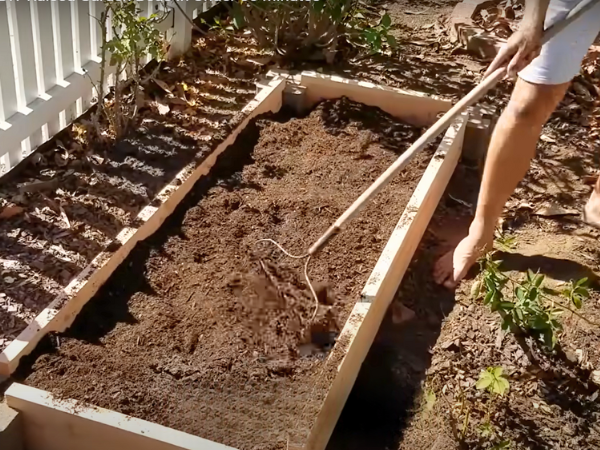
Filling The Bed: Soil And Compost Tips
Choosing the right soil and compost mix can make a big difference. Let’s explore the best soil mix and layering methods to ensure your garden thrives.
Best Soil Mix For Raised Beds
The right soil mix is crucial for your raised bed. A good mix promotes healthy root growth and nutrient absorption. The ideal blend includes:
- Topsoil: This forms the base of your mix.
- Compost: Adds nutrients and improves soil structure.
- Aerators: Perlite or vermiculite improve drainage and aeration.
A recommended ratio for your soil mix is:
| Component | Ratio |
|---|---|
| Topsoil | 50% |
| Compost | 30% |
| Aerators (Perlite/Vermiculite) | 20% |
This blend provides a well-balanced environment. It promotes moisture retention and drains excess water.

Layering For Drainage And Nutrition
Layering your raised bed helps with drainage and nutrition. Use a “lasagna method” of alternating layers of compost and soil. This method creates a rich environment for plants.
Start with a layer of coarse material at the bottom. Use straw, small branches, or wood chips. This layer allows excess water to drain.
Then, alternate layers as follows:
- First Layer: Coarse material for drainage.
- Second Layer: A mix of compost and topsoil.
- Third Layer: More compost for nutrients.
- Final Layer: Topsoil to plant in.
Each layer should be about 4 to 6 inches thick. This method helps the soil stay warm and moist. It also attracts beneficial organisms.
Maintenance Tips For Long-term Success
Focus on watering, mulching, and seasonal care. These tips will ensure your garden flourishes year after year.
Watering And Mulching Your Raised Bed
Raised beds can dry out quickly. Keep soil moist—not soggy—and apply mulch to retain moisture. Mulching helps control weeds and keeps the soil temperature steady.
Here are some tips for effective watering and mulching:
- Water in the morning. This prevents evaporation.
- Check soil moisture with your finger. It should feel damp.
- Use a drip irrigation system for even watering.
Use 2-3 inches of mulch to cover the soil. This protects roots and keeps moisture in. Regularly check for weeds. Remove them by hand or with a hoe.

Seasonal Bed Care And Soil Replenishment
Seasonal care is vital for maintaining a healthy garden. Each season brings different needs. Top off with compost each season and rotate crops for soil health. This keeps nutrients balanced in the soil.
Follow these seasonal care tips:
- Spring: Test soil and add compost. Prepare for planting.
- Summer: Monitor for pests. Water regularly.
- Fall: Clear debris and add organic matter to soil.
- Winter: Cover beds with mulch or a tarp to protect them.
Replenishing soil nutrients is essential. Consider using:
- Compost: Adds organic matter and nutrients.
- Manure: Provides rich nutrients for plants.
- Cover Crops: Plant during off-seasons to improve soil.
Regular maintenance ensures your raised garden beds thrive. Follow these tips for a successful garden all year long.


